Starting a new fitness routine can feel overwhelming. Many people find traditional yoga intimidating. Poses seem impossible. Studio environments might not feel welcoming. However, there is a solution: Curvy Yoga for beginners. This approach makes yoga accessible to all body types. It emphasizes modifications and self-acceptance.
The video above provides an excellent introduction. It guides you through foundational poses. You can practice these safely at home. This post will further explore the benefits. It will also detail key poses and essential modifications. Embrace your yoga journey with confidence and comfort.
Embracing Curvy Yoga: A Welcoming Practice for All
Curvy yoga acknowledges diverse body shapes. It offers a gentle entry point into yoga. This inclusive practice celebrates every individual. It removes common barriers to participation. Consequently, more people can experience yoga’s benefits.
Statistics indicate that body image concerns affect many. A study published in the *Journal of Women & Aging* in 2017 highlights this. It shows how these concerns can deter physical activity. Curvy yoga directly addresses these issues. It fosters a supportive atmosphere. Every body can thrive on the mat.
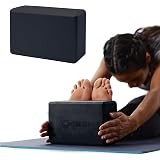
This approach often incorporates props. Blocks, straps, and blankets become valuable tools. They extend your reach. They also provide stability. These tools allow deeper relaxation. Ultimately, props ensure safe alignment for everyone.
The Foundational Role of Breath and Mindfulness
Yoga deeply connects breath with movement. The video highlights this fundamental principle. It instructs you to inhale through the nose. Exhale also through the nose. This breathing technique is Ujjayi breath. It calms the nervous system.
Controlled breathing offers numerous physiological benefits. Research from the *Journal of Alternative and Complementary Medicine* (2018) supports this. Consistent practice can lower heart rate variability. It also reduces levels of cortisol, the stress hormone. Therefore, mindful breathing enhances overall well-being. Focus on your breath. Count your inhales to three or four. Match your exhales to the same count. This simple action deepens your practice.
The instructor guides you through a body scan. This practice cultivates inner awareness. You identify areas of tension. You then direct your breath to release them. This process improves body perception. It also fosters greater self-compassion. Many studies on mindfulness show similar positive outcomes. For example, a 2014 meta-analysis in *JAMA Internal Medicine* found mindfulness meditation effective. It improved anxiety, depression, and pain.
Essential Poses for Beginners Yoga at Home
The video covers several fundamental yoga postures. Each pose offers unique benefits. They help build strength and flexibility. They also promote mental clarity. Here, we delve deeper into these essential moves.
Savasana: The Art of Rest and Relaxation
Savasana, or Corpse Pose, often begins and ends a yoga session. It sounds simple. Yet, it is profoundly challenging for some. The pose requires complete stillness. You allow your body to surrender to the earth.
To set up, lie flat on your back. Your feet are slightly wider than your hips. Let them gently flop outwards. Position your palms face up near your body. Allow your chin to drop slightly towards your chest. This lengthens your neck. Close your eyes. Begin to observe your breath. This pose actively encourages relaxation. It integrates the practice’s benefits. Experts often recommend a minimum of five minutes in Savasana. This maximizes its restorative effects.
Cat-Cow Pose: Awakening the Spine
Cat-Cow is a dynamic sequence. It warms the spine. This pose coordinates movement with breath. It improves spinal flexibility. Moreover, it strengthens the core muscles.
Start on all fours. Align your hands under your shoulders. Position your knees directly under your hips. Flatten your feet on the floor. Inhale, drop your belly, and lift your gaze. This is Cow Pose. Exhale, round your spine upwards. Draw your navel towards your spine. This is Cat Pose. Perform six to eight repetitions. Synchronize each movement with your breath. This creates a fluid, meditative flow. This rhythmic movement helps alleviate back pain. A 2012 study in *Spine* indicated yoga significantly reduces chronic low back pain.
Child’s Pose: Your Sanctuary for Rest
Child’s Pose (Balasana) offers deep relaxation. It gently stretches the lower back. It also calms the mind. This pose provides a safe retreat. You can return to it anytime during your practice.
From all fours, bring your buttocks towards your heels. You can keep your knees together. Or, widen them for more space. Rest your forehead on the mat. Extend your arms forward or back. Place a block under your forehead for comfort. Use extra blocks if needed. This modification ensures proper spinal length. It also promotes shoulder relaxation. Deep breathing in this pose helps release tension. It offers a moment of grounding.
Downward-Facing Dog: A Full-Body Stretch
Downward-Facing Dog (Adho Mukha Svanasana) is iconic. It lengthens the spine. It also stretches the hamstrings. This pose strengthens the arms and legs. It invigorates the entire body.
Begin on all fours. Tuck your toes under. Lift your knees. Push your hips high towards the sky. Keep a slight bend in your knees. This protects your hamstrings. Actively press your hands into the floor or blocks. Walk your feet slightly towards your hands. Aim to bring your heels closer to the mat. Your feet should be hip-distance apart. Relax your shoulders away from your ears. Bend one knee, then the other. Perform five to six repetitions. This action helps lengthen your hamstrings. It promotes a feeling of openness in the body.
Standing Poses for Strength and Balance
Moving from the floor to standing poses builds strength. These poses challenge your balance. They also improve concentration. Always find your stable foundation first.
Centering Your Stance: Tadasana Principles
Before any standing sequence, find your center. Stand with feet together or hip-distance apart. The video suggests turning toes out, then heels. This method finds correct foot placement. Engage your kneecaps. Tighten your quadriceps. Tuck your tailbone slightly under. Squeeze your buttocks. Draw your navel towards your spine. Allow your shoulders to relax down. Close your eyes. Feel your body gently sway. Open your eyes once you feel stable. This centered feeling is crucial. It provides a solid base for all standing poses.
Sun Salutation Sequence: Flow and Energy
Sun Salutations (Surya Namaskar) are a series of poses. They warm the body. They also build internal heat. This sequence improves flexibility and endurance. It creates a flowing meditation.
Begin in your centered stance. Inhale, sweep your arms out and up. Bring your palms to touch. Look towards your thumbs. Perform a gentle backbend. Exhale, hinge forward from your hips. Keep a straight torso. Bring your hands to the floor or blocks. Place your palms flat. Step your right leg back, then your left. Enter Downward-Facing Dog. Walk your feet slightly in. Bend and straighten your knees a few times. This further stretches your hamstrings. Look between your hands. Step your right leg forward, then your left. Inhale, sweep your hands out and up. Bring palms to touch. Execute a slight backbend. Return your hands to your sides. This entire sequence boosts energy. It provides a full-body workout.
Warrior Poses: Empowering Your Practice
Warrior poses embody strength and focus. The video demonstrates a variation of Warrior II. These poses strengthen the legs. They also open the hips. They build mental resilience.
Step your right leg far back. Your feet are wide. Your front heel aligns with your back arch. Lift your arms to shoulder height. Keep your torso straight. Bend your front knee. Align it directly over your ankle. Hold this position for four deep breaths. Turn your front toes in. Turn your back toes out. Repeat on the other side. Look towards your front hand. Hold for four more breaths. Warrior poses cultivate inner power. They improve stability and concentration.
Chair Pose (Utkatasana): Building Core Strength
Chair Pose, or Fierce Pose, strengthens your legs. It engages your core. This pose builds heat. It also improves balance.
Start with feet together or hip-distance apart. Engage your core muscles. Inhale deeply. Bend your knees deeply. Imagine sitting in a chair. Tuck your tailbone under. Lift your hands overhead. Maintain a straight torso. Hold for two to four deep breaths. Bring your hands to your heart center. Hinge forward from your waist. Place your hands on the floor or blocks. Step back into Downward-Facing Dog. These dynamic movements challenge strength. They simultaneously promote flexibility.
Continued Journey in Curvy Yoga
Consistent practice yields remarkable results. The journey of Curvy Yoga is deeply personal. Focus on your body’s sensations. Always prioritize comfort and safety. Remember the #healthhasnosize message. Yoga is truly for everyone.
Finding Your Flow: Curvy Yoga Questions for Beginners
What is Curvy Yoga?
Curvy Yoga is an inclusive and gentle approach to yoga designed to be accessible for all body types. It focuses on modifications and self-acceptance, making the practice welcoming for beginners.
Why is Curvy Yoga a good option for beginners?
Many find traditional yoga intimidating, but Curvy Yoga provides a supportive environment that addresses common body image concerns. It emphasizes modifications to make poses achievable and comfortable for diverse body shapes.
What are yoga props and how are they used in Curvy Yoga?
Yoga props like blocks, straps, and blankets are valuable tools used to extend your reach, provide stability, and allow for deeper relaxation. They help ensure safe alignment and make poses more accessible for everyone.
Why is breath so important in yoga?
In yoga, breath is deeply connected with movement and plays a key role in calming the nervous system. Consistent mindful breathing can lower heart rate and reduce stress, enhancing overall well-being.